Recent Water Damage Posts
Drying Techniques: Air Movers, Dehumidifiers, and More for Effective Water Damage Restoration
1/17/2024 (Permalink)
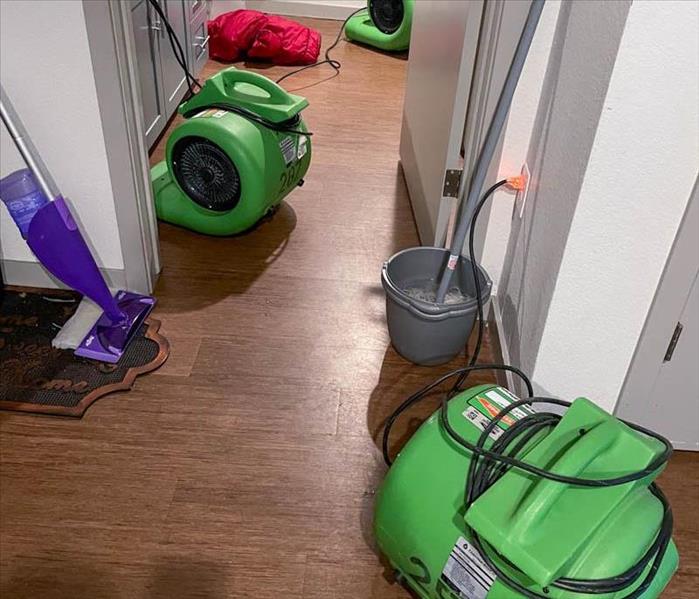
When faced with water damage in your home, employing proper drying techniques is crucial to prevent further damage and mitigate the risk of mold growth. In this blog, we will discuss various drying techniques, including air movers, dehumidifiers, and other equipment used in water damage restoration, helping you understand their functions and the importance of professional drying methods.
Air Movers: The Power of Air Circulation
Air movers are essential tools in water damage restoration. They create high-velocity airflow, facilitating evaporation and efficiently drying affected areas. Learn about the different types of air movers, their placement strategies, and how they promote faster drying and prevent moisture buildup.
Dehumidifiers: Controlling Humidity and Preventing Mold
Dehumidifiers work hand in hand with air movers to control humidity levels during the drying process. Understanding the different types of dehumidifiers, their moisture removal capacities, and how they maintain optimal humidity levels is vital in preventing mold growth and ensuring thorough drying.
Moisture Meters: Measuring Hidden Moisture
Moisture meters are indispensable tools for detecting and measuring moisture levels in various materials. Professionals use these devices to identify hidden pockets of moisture that may not be visible to the naked eye, aiding in accurate drying assessments.
Thermal Imaging Cameras: Identifying Hidden Water Intrusion
Thermal imaging cameras help identify hidden water intrusion by detecting temperature variations. By capturing infrared images, these cameras can locate potential moisture sources behind walls, ceilings, and other surfaces, allowing for targeted drying efforts.
Injectidry Systems: Specialty Drying for Hard-to-Reach Areas
Injectidry systems are utilized to dry hard-to-reach areas, such as wall cavities, underflooring, and tight spaces. By forcing air into these spaces, moisture is extracted effectively, preventing potential damage and mold growth.
Desiccant Dehumidifiers: Efficient Drying in Challenging Conditions
Desiccant dehumidifiers excel in extreme temperature or low humidity conditions, making them ideal for challenging drying scenarios. Understanding how desiccant dehumidifiers work and their unique moisture removal process will enable more effective drying in adverse environments.
Heat Drying Techniques: Accelerating Evaporation
Applying controlled heat during the drying process can accelerate evaporation rates. Learn about heat drying techniques like direct-fired heaters, indirect-fired heaters, and heat mats, and how they aid in faster and more thorough drying.
Ventilation: Enhancing Airflow and Evaporation
Proper ventilation is crucial to removing excessive moisture and preventing stagnant air during the drying process. Discover the importance of opening windows, using exhaust fans, and employing other ventilation strategies to enhance airflow and expedite drying.
Employing the right drying techniques and equipment is paramount in water damage restoration. From air movers and dehumidifiers to moisture meters and thermal imaging cameras, understanding these techniques and tools will help you appreciate the importance of professional drying processes in efficiently restoring your home after water damage.
How to Detect Signs of Water Damage in Your Home
10/16/2023 (Permalink)
 Being able to recognize the common signs of water damage in your home is crucial for addressing issues early and preventing serious damage.
Water damage in a home can be a costly and troublesome problem. It can lead to structural damage, mold growth, and even health issues if not addressed promptly. Recognizing the signs of water damage early on is crucial to prevent further damage and mitigate the risk of long-term issues. In this blog post, we will discuss common signs of water damage in your home that you should be aware of.
Water Stains
Water stains are one of the most visible signs of water damage. Look for discolored patches on ceilings, walls, and floors, especially in areas near plumbing fixtures or where water is commonly used. These stains can range in color from yellowish-brown to dark brown and may indicate a leak or water seepage behind the surface.
If you notice a persistent musty smell in certain areas of your home, it could be a sign of hidden water damage. Mold and mildew thrive in damp conditions, and their presence can result in unpleasant odors. Pay close attention to basements, crawl spaces, bathrooms, and areas near water sources, as they are more prone to moisture-related issues.
Mold and Mildew Growth
Visible mold and mildew growth are clear indicators of excess moisture or water damage. Check for signs of mold on walls, ceilings, and around windowsills. Mold can appear in various colors, such as black, green, or white, and may appear fuzzy or discolored. Act quickly to address these issues, as mold can cause health problems and further damage to your home.
Water damage can cause paint to peel, bubble, or crack due to the moisture affecting the adhesion between the paint and the surface. Large bubbles or areas of peeling paint are often signs of trapped moisture or leaks behind the walls. If left unaddressed, this can lead to further damage, including the potential for mold growth within the walls.
Warped or Buckled Flooring
Water damage can cause flooring materials such as wood, laminate, and vinyl to warp or buckle. Look for uneven or lifted flooring, floorboards that have changed shape, or gaps between the floorboards. These issues occur when excess moisture seeps into the subfloor or affects the integrity of the flooring material.
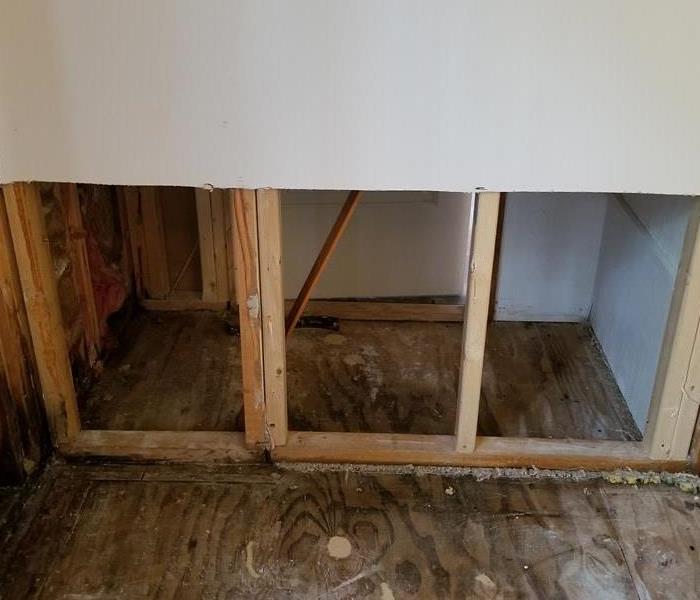
Prolonged exposure to water can cause drywall to deteriorate or become stained. Look for visible signs of sagging, bulging, or crumbling drywall. Wet drywall may also feel soft or spongy to the touch. Staining on drywall, such as yellow or brown marks, can indicate water damage or an ongoing leak. A sudden and unexplained increase in your water bills could be a sign of a hidden water leak. Monitor your water consumption and compare your bills over time. If you notice a significant and consistent increase, it may indicate a leak in your plumbing system or water fixtures.
Being able to recognize the common signs of water damage in your home is crucial for addressing issues early and preventing further damage. If you notice water stains, musty odors, mold, and mildew growth, peeling or bubbling paint, warped flooring, deteriorating drywall, or unexplained increases in water bills, it is important to take prompt action. By addressing water damage in a timely manner, you can protect your home, preserve its integrity, and avoid costly repairs down the line.
A Step-by-Step Guide: How to Flush a Water Heater
7/27/2023 (Permalink)
 Ensuring you have a properly working water heater can help prevent water damage in your home or business.
Maintaining your water heater is essential for its longevity and efficiency. Over time, sediment and mineral deposits can accumulate in the tank, reducing its heating capacity and potentially damaging the system. Flushing your water heater regularly helps to remove these deposits and ensure optimal performance. In this blog post, we'll guide you through the process of flushing a water heater, step by step.
Step 1: Safety Precautions
Before you begin, it's important to take some safety precautions:
- Turn off the power: If your water heater is electrically powered, switch off the circuit breaker dedicated to the heater. For gas-powered heaters, set the thermostat to the pilot position.
- Allow the water to cool: Flushing a water heater requires handling hot water, so give it ample time to cool down to avoid scalding injuries. It's best to perform the task in the morning or early afternoon to allow sufficient cooling time.
Step 2: Gather the Necessary Tools and Materials
To flush your water heater, you'll need the following items:
- Garden hose: Ensure that it's long enough to reach from the water heater to a nearby drain or outside.
- Adjustable wrench or pliers: You'll need these tools to disconnect and reconnect the hose.
- Bucket or a large container: This will be used to collect the flushed water and sediment.
- Safety goggles and gloves: Protect yourself from potential splashes and debris during the process.
Step 3: Locate the Drain Valve
The drain valve is usually located near the bottom of the water heater. It typically resembles a faucet or a hose bib. Once you've located it, ensure that the area around the valve is clear of any obstructions.
Connect one end of the garden hose to the drain valve. Ensure it is tightly secured to prevent leaks. Place the other end of the hose at a suitable drain location or outside where the water can safely flow.
Step 5: Open the Drain Valve
Carefully open the drain valve by turning it counterclockwise. This will allow the water to start flowing out of the water heater and through the hose. Be cautious as the water may be hot and contain sediment.
Step 6: Flush the Water Heater
Allow the water to flow through the hose for about 5-10 minutes, or until it runs clear. This process helps to flush out the accumulated sediment and mineral deposits from the tank. The water may appear discolored at first but should gradually clear up.
Once the water runs clear, close the drain valve by turning it clockwise. Ensure it is tightly closed to prevent any leaks.
Step 8: Refill the Tank
Remove the hose from the drain valve and close the valve securely. Turn on a hot water tap in your home to allow air to escape from the system. This will help prevent airlocks when refilling the tank. Now, turn on the water supply to refill the tank.
If you had turned off the power supply, now is the time to restore it. Switch on the circuit breaker for electric heaters or set the thermostat back to the desired temperature for gas-powered heaters.
Regularly flushing your water heater is a simple yet crucial maintenance task that can significantly extend its lifespan and ensure efficient performance. By following the step-by-step guide outlined above, you can easily flush your water heater and remove sediment and mineral deposits, thereby improving its overall efficiency. Remember to exercise caution, follow safety measures, and consult the manufacturer's instructions for specific guidance. With proper maintenance, your water heater will continue to provide reliable hot water for years to come.
How do you know if you have a shower leak
3/20/2023 (Permalink)
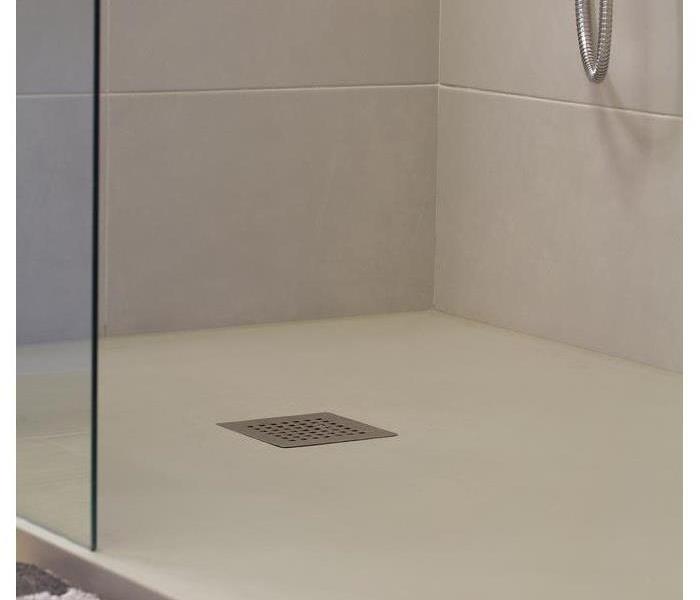 Use these tips to help prevent a shower leak, give SERVPRO a call today for your water damage.
It's possible to have a leak in your shower that you don't even know about. You may not see any obvious signs of water damage, but behind the scenes, moisture can create mold and mildew and cause long-term damage. Here are some tips for identifying potential leaks.
Check for water stains on your ceiling.
If you see water stains on your ceiling, it's likely that a leak is present somewhere in your home. The best way to determine if a leak exists is by looking at the source of those stains carefully and seeing if any other signs of leaking have been left behind. If no leaks are found in this area, then there may be an issue with condensation. If there are signs of a leak, call a plumber immediately!
Listen for dripping water, especially at night when you're sleeping.
If you hear any dripping of water at night, especially in the middle of the night when you're sleeping, check your faucet. If it's dripping or has a leaky showerhead, fix it immediately!
If that doesn't work and you still hear dripping, check for any leaks outside your house. There could be a small hole in your roof that's allowing rainwater to enter through. If no one is home at night when this happens or even during the day, rainwater will continue to seep into places where there are gaps between shingles or boards until someone discovers it and repairs them before more damage occurs.
Look for discoloration.
If you see discoloration on walls and baseboards, it's a sign that there is water damage. If the damage is not addressed it can cause secondary damages like mold and mildew damage. This can grow on surfaces that are damp or wet for extended periods of time and cause damages in the near future.
Use a moisture meter to check for water leaks in your walls.
If you suspect that there may be a leak in your home, it's important to check for water damage. A moisture meter is an easy way to find out if there's any moisture on the inside of your walls, ceiling or basement. A moisture meter can also be used in crawl spaces and attics where it can detect water from condensation build-up on pipes or insulation materials.
While there are various types of moisture meters available today (such as digital meters), they all work essentially the same way, by measuring electrical resistance through wood or other materials that have absorbed water over time (e.g., wood framing).
These tips will help you identify if you have a leak in your shower. If you find water stains on the ceiling contact a specialist immediately to begin clean up and remediation. Give SERVPRO a call at the first sign of damage, our technicians have the experience and equipment to restore your water damage property.
5 Reasons Your Faucet Is Dripping Water and How To Fix It
11/14/2022 (Permalink)
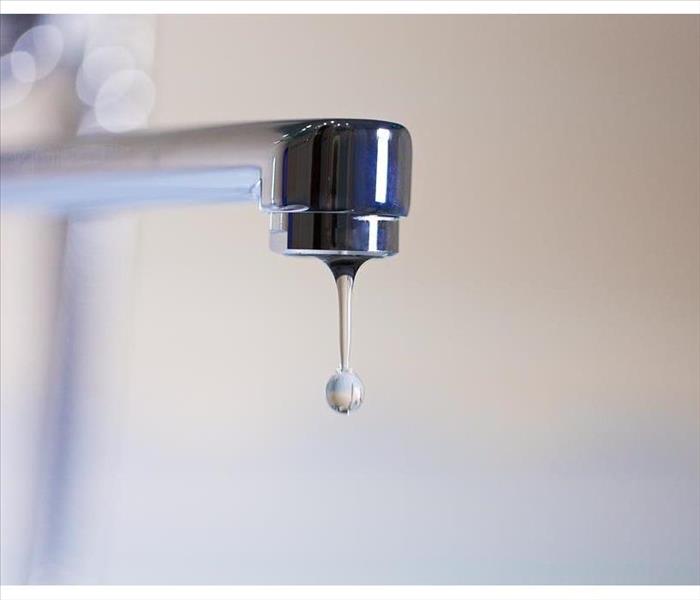 A leaking faucet can lead to a big problem.
How To Fix a Dripping Faucet
A dripping faucet can be a nuisance, especially when it's happening in the middle of the night. If you're having a problem with a leaky faucet, this article will help explain why your sink is dripping water and what you need to do to fix it.
Reason #1: Your Washer Is Worn
You may have a leaking faucet if the washer is worn out. The washer is the part of your faucet that seals against its body and prevents water from flowing out. Over time, wear and tear can cause this seal to become loose or even break apart entirely, thus allowing water to drip at an alarming rate.
To fix this problem, first purchase a replacement washer for your particular model of faucet (you can buy them online or at any hardware store). Once you've bought it, remove all visible parts from inside the spout—this will include anything like screws or nuts—and then take off any cover plates on top of where you'll be working so that you can access everything easily without having to use tools. Next up, grab your new replacement washer and place it inside where your old one once sat; make sure both ends line up correctly before reattaching all other parts back into place again!
Reason #2: Your O-Ring Needs Replacing
If you're lucky, your dripping faucet is due to a worn-out O-ring. If this is the case, it's an easy fix. You'll need to remove the spigot from your sink and take off its parts (using pliers if necessary). You'll then need to replace the rubber ring that seals around the stem of your faucet. This can be done by buying a new O-ring at any hardware store or home improvement store and putting on a new one using tools like needle nose pliers or channel locks.
Reason #3: You Need To Replace a Cartridge in the Faucet
Cartridges are the most common cause of leaking faucets. They are easy to replace and can be replaced without removing the faucet or shutting off the water supply.
After you have located your cartridge, remove it from its housing by turning it counterclockwise until it is completely removed. Then, insert a new one into place by turning it clockwise until it stops resisting insertion (you should feel this). If you’re unsure about whether or not you have successfully inserted your new cartridge, try tightening it slightly more than finger-tight so that there aren’t any gaps between threads and housing surfaces; if there are no gaps and everything feels secure, then congratulations! The leaky condition has been fixed!
Reason #4: The Water Supply Tube Is Damaged
If you have a leak in your water supply tube, it's likely that this is the cause. The water supply tube connects your faucet to the municipal water supply. If there are any leaks or cracks in this pipe, it will result in drips coming from under your sink.
The first thing you should do when trying to locate a leaky water supply tube is to check its length and diameter. If it's too short, it could be kinked or crimped causing an improper seal around the faucet body (the part that screws into the sink).
If you think that may be causing problems with your leaky faucet consider getting a longer one (usually available at hardware stores) and replacing it with another section of pipe so as not to disturb other systems such as PEX tubing or wiring if they're located on top of each other near where these pipes connect together.
Reason #5: The Diverter Needs to Be Replaced
The diverter is a small valve located between the faucet and sink drain. The job of this valve is to divert water flow away from the sink, so it doesn't overflow. If your faucet has been dripping for several months, there's a good chance that your diverter needs to be replaced.
Replacing your diverter can be done by any handy homeowner with basic tools and some plumbing knowledge. Depending on how much wear and tear has occurred, replacing this part will cost anywhere between $15-$50 dollars depending on where you purchase it.
Sometimes it takes some investigation to figure out how to fix a leaky faucet, but there's a reason. A dripping faucet can be caused by many things: water hardness in your area, the age of your fixture and pipes, or even a small crack in the spout. Some problems are easier to fix than others—and some require professional help.
If you've ruled out all the possible reasons your faucet is leaking and it still isn't fixed, then it's probably time to call a plumber. It's not always easy to find the source of a leaky faucet, but if you follow these steps and take your time troubleshooting, you'll be able to solve most problems on your own.
Sometimes a leaky faucet can lead to a big problem. No matter how large of a water damage event you have, SERPVRO of Highlands Ranch is here to help you get your Lone Tree, CO home back to normal.
What You Need To Know About Water in Light Fixtures
8/31/2022 (Permalink)
 Light fixtures are the last place we expect to see water
Information on Water in Lighting Fixtures
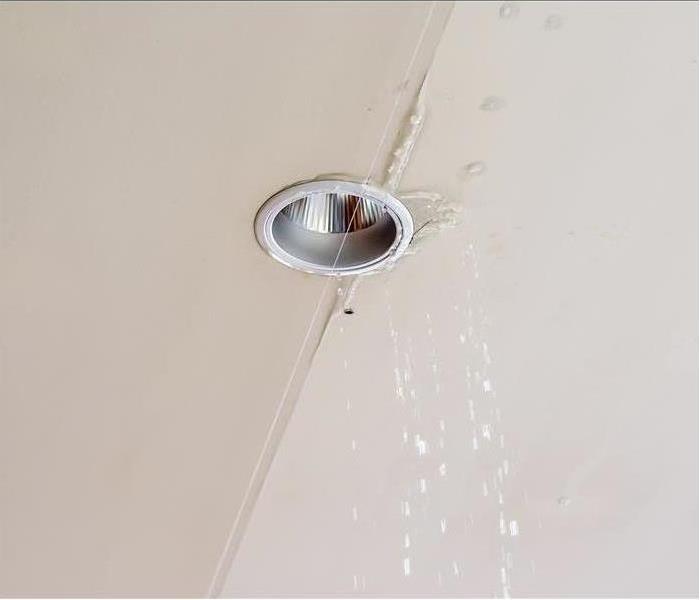
Light fixtures are probably the last place you'd expect to see water, but it happens more often than you would think. As a homeowner in Lone Tree, CO, you need to know the risks of water in light fixtures, what to do about it, the causes, and how to prevent it.
Risks
Risks of such leaks include:
- Electrocution
- Electrical Fires
- Ceiling damage
- Ceiling collapse
What To Do
Because dealing with water in light fixtures is so dangerous, it is always best to call an electrician for help. Use your home's breaker box to shut off electricity immediately after discovering the leak, but do not touch the light switch, water, or light fixture. Water conducts electricity, so you could be electrocuted if you come into contact with any part of the circuit.
This flooding can also cause ceiling damage. You may notice the area dripping water or sagging. This could cause your ceiling to collapse. A water damage restoration specialist should be called to repair your ceiling as quickly as possible.
Causes
The main causes are water leaking from your air conditioning unit, a leaking pipe, bad weather, and overflowing toilets or sinks. If possible, stop the source of the leak by shutting off the water supply or turning off the faucet that is causing an overflow.
Prevention
Overflowing toilets and sinks are easily preventable. Make sure to keep an eye on running water in bathtubs, showers, and sinks, so that they do not overflow. If a toilet will not flush, do not flush it again, as this can cause it to overflow. Instead, plunge the toilet to clear blockages. Replacing air filters regularly can help avoid air conditioning leaks. If you notice your ceiling leaking at all during bad weather, have it checked as soon as possible to prevent more severe leaks later on. Installing leak detection systems and avoiding harsh, chemical cleaners can prevent leaking pipes.
When you do have water in light fixtures, being aware of the risks and what to do can help keep you safe and minimize damage to your home.
How To Safely Manage Wet Light Fixtures
7/30/2022 (Permalink)
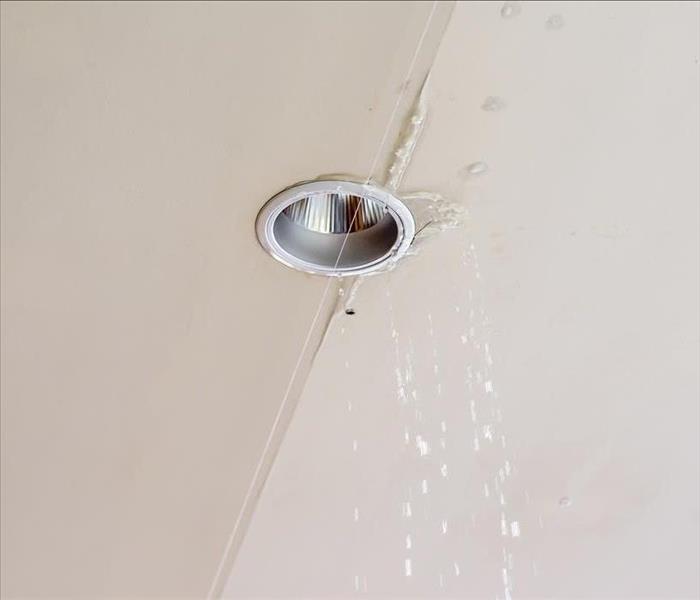 Water in light fixtures originates from somewhere in your ceiling.
How To Handle Wet Lighting Fixtures Safely
Some things are made to go together, like peanut butter and jelly or cake and ice cream. However, water and electricity are unquestionably not a good match. As a homeowner in Beverly Hills, CO finding water in light fixtures is a scary and dangerous situation. How do you safely act in this situation? What happens if there is significant ceiling damage as well? Take the following actions to keep your family and your home safe.
What Immediate Actions Do I Take?
• First, stop and think before you act. Do not touch the light fixture or the switch that turns it off. Electricity must be turned off at the circuit breaker box. Confirm that the electricity is off by testing safe, dry outlets nearby.
• Unless you are a qualified electrician, do not attempt to remove the wet light fixture. Once the light is removed a new fixture should be used.
• If possible, locate the offending water source and turn off the water supply. Ceiling damage can have a number of causes such as a broken pipe, an overflowing toilet or a clogged drain.
How Do I Deal With Water Damage?
• Water in light fixtures originates from somewhere in your ceiling. Have your home inspected as soon as possible by a water restoration specialist. Without proper inspection by an expert, it is hard to know whether there is significant damage hidden from your view.
• After the inspection, the specialist makes a plan to properly dry, disinfect and restore your home to pre-water damage condition.
• Contact your insurance agent to see if water loss is covered by your policy.
When there is unexpected water in light fixtures at your home in Beverly Hills, CO remember that your safety is most important. Electricity and water are always a dangerous combination. Have the ceiling damage inspected and addressed by a reputable water restoration professional as soon as possible..
Avoid Plumbing Issues by Being Proactive
6/22/2022 (Permalink)
 Keep an eye out for dripping taps.
Be Proactive to Avoid Plumbing Issues
Plumbing is something that everyone needs but often takes for granted. It is usually only after plumbing problems are discovered that building owners get moving. Then, it could be too late to avoid water damage. The best thing to do is to remain proactive to prevent various issues with this essential system in your Roxborough Park, CO, commercial building.
1. Look for Leaks
Regularly look for small leaks around your plumbing lines, including sinks, toilets, showers, dishwashers, clothes washers, refrigerators, freezers, HVAC systems and water heaters. Also, keep an eye out for dripping taps. Any of these leaks can appear to be tiny. Still, they can quickly turn into excessive water bills and significant losses which require help from professionals, such as water damage restoration experts and plumbers.
2. Check the Toilet Flapper
A toilet flapper that is set incorrectly can result in a leak. The flapper is the arm with a weighted ball on the end that opens and shuts the inlet valve every time the toilet is flushed. It rises and falls with the water levels. This is how the water from the cistern is released to the bowl and then refilled. This is one of those plumbing problems that can result in high water bills but is typically an easy DIY repair.
3. Inspect Your Water Main
Your water main connects your building's plumbing system to the public water supply. It is usually located underground, so it's essential to know the signs of a broken pipe or other types of water main leaks. Here are just a few:
- Low water pressure
- High water bills
- Water bubbling in the street
- Water stains on drywall and/or ceilings
4. Clear Blocked Drains
You may notice a sink or bathtub emptying slower than it should. This probably means that the drain is blocked. Fortunately, this is usually an easy fix by using a drain snake.
Plumbing problems are something you hate to discover in your commercial building. However, many potential issues can be avoided by being proactive.
The Different Levels of Contaminated Water
2/25/2022 (Permalink)
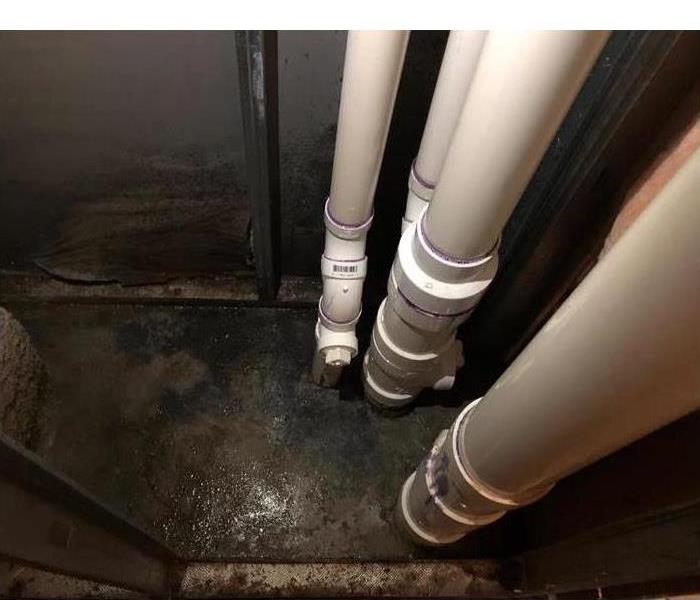 A water leak can cause mold growth.
Water Damage Categories
Not all water is the same, and when you have a flood in your home, you want to leave it to the professionals to deal with contaminated water of any kind. Some flood water in Roxborough Park, CO can be relatively clean while some homeowners have to contend with black water at one point or another. Any kind of water can lead to mold growth, so address your precise situation as best you can.
1. Category 1
Category 1 water is typically clean, but it may contain contaminants from the surrounding area. This type of water usually comes from a faulty supply line on an appliance or a broken water pipe. When the water leaks out into a room, it may pick up soil or materials from the surrounding area, such as materials from the subflooring, decking or walls. However, if it is accidentally consumed, then it should not result in any serious illness.
2. Category 2
Category 2 contaminated water is slightly more dangerous. In the event a person accidentally consumes it, then it would likely result in some discomfort or sickness. This level can also be called grey water, which can include water that comes from sink drains or washing machines.
3. Category 3
Category 3 flood water is the most dangerous and most commonly referred to as black water. This water typically contains fecal matter and can come from a toilet overflow. It can also come from rainwater picking up contaminants from the outside soil and bringing them inside your home in Roxborough Park, CO. Additionally, standing water can promote bacterial growth.
Allowing water to stand in a room can cause less dangerous contaminated water to grow worse by the second. Fungi just need stagnant air, a moderate temperature and moisture to grow. This is why it is so critical to remedy the situation as soon as you can.
Contaminated Water Removal Requires Professional Training and Tools
1/28/2022 (Permalink)
 Restoration companies categorize water into three groups.
Flooding poses many problems for Beverly Hills, CO, homeowners beyond the obvious cleanup requirements. Contaminated water, black water and clean water from an uncontaminated supply line are all part of the puzzle, and each has special requirements in the restoration process. One of the first steps a restoration company takes is determining what type of water is making a mess of your home.
3 Categories of Water
Restoration companies categorize water into three groups:
• Category 1: This is water that is safe to drink. Known as “clean water,” it is provided through a sanitary source, such as drinking fountains and faucets. Water in your toilet tank and water heater is also considered clean.
• Category 2: Water in this category is “gray water.” It contains contaminants that can make you sick if you drink it. Gray water can come from an overflowing clothes washer or dishwasher, or may be water flushed from sink drains. It can even be water from an overflowing toilet that may contain urine, but not feces.
• Category 3: This is the worst type of contaminated water. This type of water comes from sewer backup or overflow with feces, along with floodwaters from rivers or streams.
Making Restoration Plans
A sink or tub overflow involves clean water, which has no special handling or disposal requirements. Depending on the severity of the overflow, you may be able to salvage flooring, carpeting, baseboards and furniture, as well as drywall.
Contaminated water, including both gray and black water, should be handled by restoration professionals. It requires special training and tools to assess both the water and water damage and to develop a restoration plan for your Beverly Hills, CO, home. If you are unsure whether your water supply line has been compromised, be sure to boil your water until supply system operators tell you it’s safe to use.

 24/7 Emergency Service